Attendee feature lets the user track people who were part of a Meals Expense. It lets the user tag the Attendee's First Name, Last Name, Title, Organization, and Type (Client, Colleague, etc)
How to use the Attendee(s) feature:
Once the feature is enabled, the user can go to the Add New/Edit Expense screen, as the user selects Expense Type with category 'Meals' then he/she can see the Add/Edit attendee(s) link as shown below.

The user has to enter the expense amount before clicking on the link "Add/ Edit Attendee(s)". Once clicked a popup will be displayed to the user.
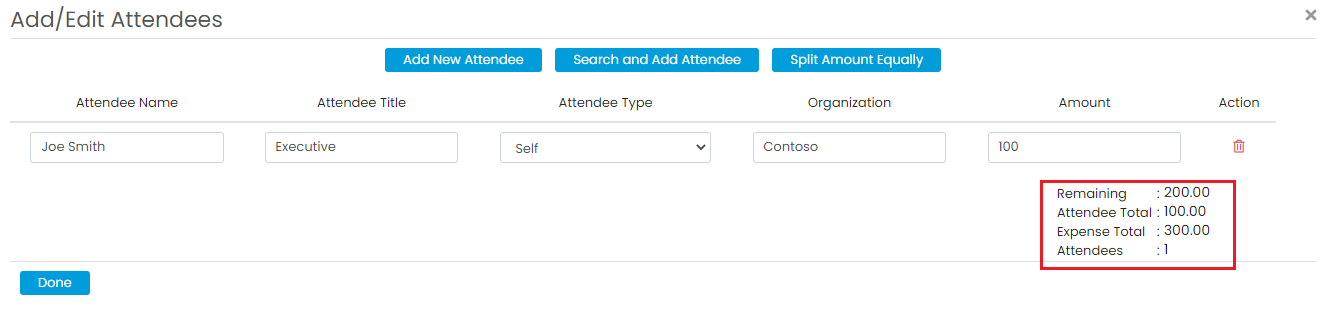
The first time this popup is opened, the user's information (i.e. Attendee Name, Attendee Type, Organization) will auto-populate on the popup (as shown below)

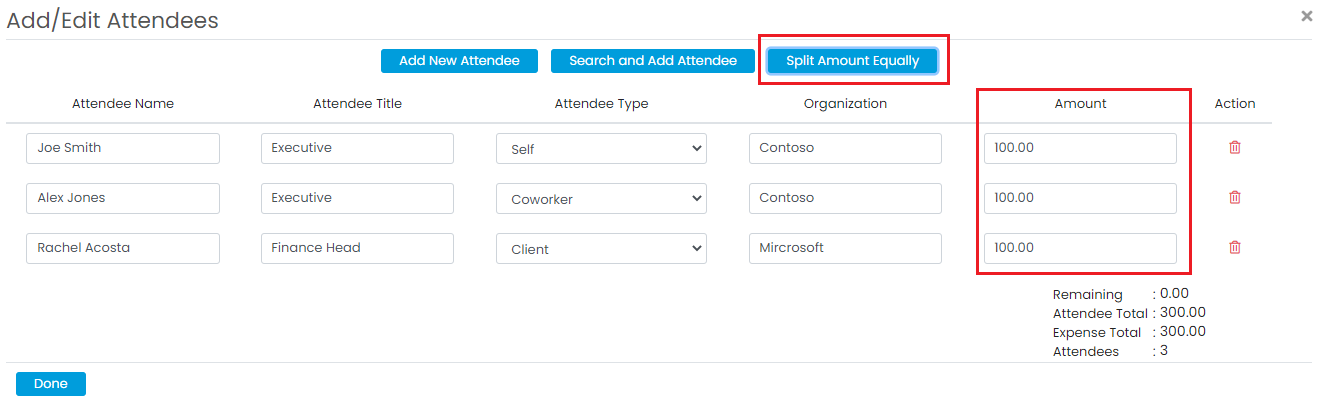
On the Add/Edit Attendees popup screen at the right bottom corner user can see the Remaining (the remaining amount), Attendee Total (Total amount currently assigned to the attendees), Expense Total, and Attendees (total count of attendees). So whenever the attendee will be added to the list, the footer values will also be updated. In the below example, we want to add 3 attendees and split the total expense equally amongst the 3 attendees (i.e. $100/attendee). You can either enter the amount manually in the amount field or click on "Split Amount Equally" button once all attendees are added.
For adding the attendee, the user can either click the "Add New Attendee" button and fill in the attendee details Or add the existing attendees from the list by clicking the "Search and Add Attendee" button.

If the user wants to add a new attendee then click on the "Add New Attendee" button and then fill in the attendee details.
 If the user wants to select the attendee(s) from the existing attendee(s) list (i.e. previously added attendees) then click on the "Search and Add Attendee" button. On the "Search and Add Attendee" popup screen, the user can search the existing attendee with the help of provided search filters.
Select the attendees which are required and click on the Select Attendee(s) button as shown below.

The selected attendees will get populated on the "Add/Edit Attendees" screen. Add the amount for each attendee and click on Done to save the changes.

The user can either choose to enter the amount manually or click on the "Amount Split Equally" button this will divide the expense amount equally for all attendees as shown below.
To delete the attendee record click on the Delete icon provided next to each attendee record.
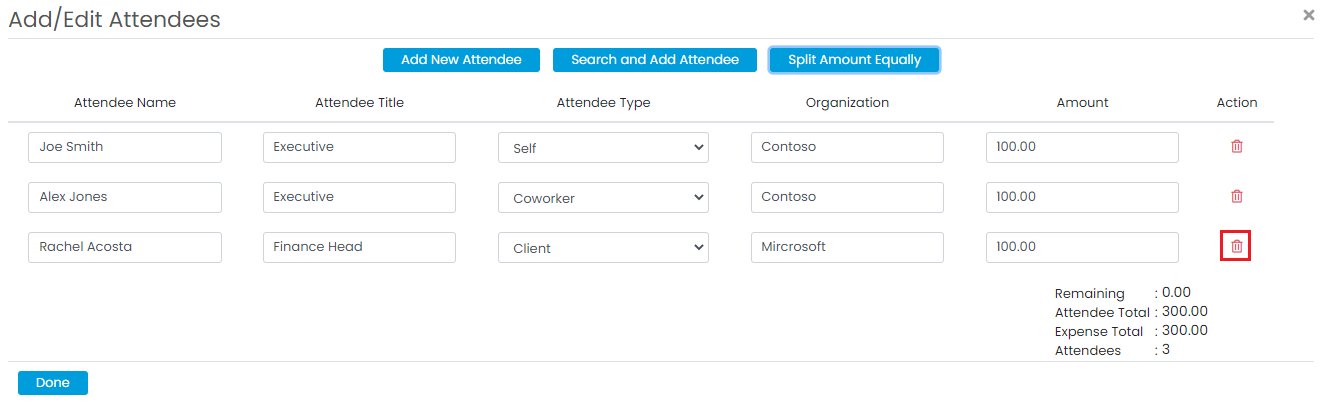
Once all the attendee details are entered the user can click on the "Done" button to save the changes.
